Why convert PSD to WordPress?
Converting PSD to WordPress is a sound strategic practice for anyone seeking a robust digital presence. The idea behind it is to leverage the power of WordPress, the world’s leading content management system to transform your stunning Photoshop design into a live interactive website. WordPress’s intuitive interface and rich plugin library transform a static image into a digital base for your business.
There are good reasons why WordPress is the most popular content management system, users can easily update and publish new content without the need for coding knowledge. This makes it easier for website owners to keep their websites up to date and relevant. Additionally, WordPress provides a wide variety of themes and plugins that can enhance the functionality of a website.
Converting a design to WordPress also allows for a more efficient code structure. WordPress has its own file structure and coding guidelines, which can result in cleaner and optimised code compared to manually coding a website from scratch. This can improve website performance and save a great deal of time when developing your website and extending it.
In essence, converting PSD to WordPress is a good strategic move to elevate your website from a static image to a digital experience. It’s about embracing flexibility, efficiency, and responsiveness. It’s the future of your online presence, and it’s here to stay.
In this article we’ll explore more about how and why to convert a PSD to WordPress.
The main benefits of Using PSD as a Design Tool and then Converting from PSD to WordPress
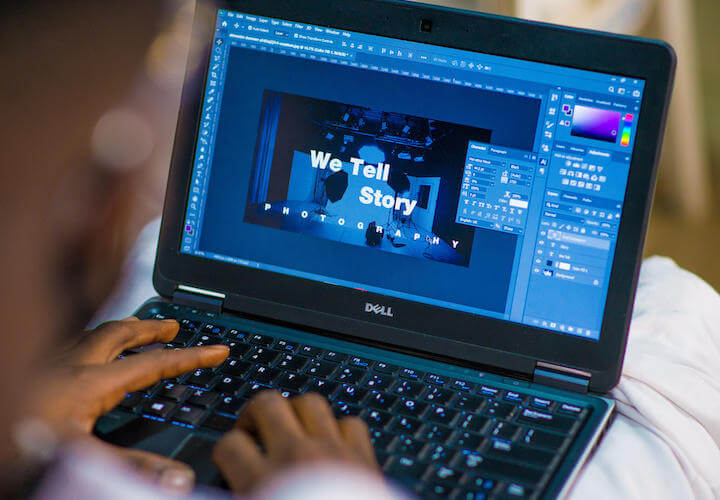
When it comes to designing a website, many designers start with Adobe Photoshop (PSD) to create stunning visual mockups. By starting with PSD, you have the freedom to create a highly custom design that perfectly matches your brand. This initial step allows you to fine-tune every aspect of your website’s appearance before moving on to development.
Converting your Photoshop design into a WordPress website brings numerous advantages. Firstly, WordPress offers a flexible and user-friendly content management system (CMS). Once you have converted your PSD to WordPress, you can easily update and publish new content without requiring any coding knowledge. This convenience allows you to keep your website up to date and relevant, providing a seamless experience for both you and your visitors.
Another benefit of converting from PSD to WordPress is the wide range of high-performance base themes available. These themes provide a solid foundation for your website, allowing you to save time and effort in development. With the right base theme, you can focus on customising and personalising your website’s design and layout, resulting in a unique and professional-looking website.
Overall, by starting with a PSD design and converting it to WordPress, you can take advantage of a highly custom design, the flexibility of a CMS, and the efficiency of WordPress’s code structure. This combination allows you to create a visually stunning, user-friendly, and high-performing website that perfectly represents your brand.
Step-By-Step Guide to Convert from PSD to WordPress
Converting a PSD design into a fully-functional WordPress theme might seem like a complex process, but with a step-by-step guide, it can be a smooth and straightforward task. Here is a comprehensive guide to help you navigate through the conversion process seamlessly.

Step 1: Analyse the Design Elements
When converting a PSD design to a WordPress theme, it is crucial to thoroughly analyse the design file to understand its structure and layout. This step allows you to identify the key sections of the design and plan accordingly for their translation into the WordPress theme.
Start by reviewing the PSD file in detail. Pay close attention to the different sections such as the header, footer, sidebar, and content. Understand the positioning and styling of each element to ensure accurate replication in the WordPress theme.
Carefully analyse any design elements that require custom CSS code or modifications to achieve the desired visual appeal. This can include background images, gradient backgrounds, solid colour backgrounds, and other visual enhancements.
Identifying these key sections and design elements early on will help you plan your development process effectively. By understanding the structure and layout of the design file, you can create a well-organised and visually appealing WordPress theme.
Taking the time to analyse the design file ensures that you have a clear understanding of the PSD design and can accurately translate it into the WordPress theme. This attention to detail plays a vital role in creating a highly-functional and visually appealing website.
Step 2: Slice and Export PSD Files
Next, slice and export the PSD design into individual image files. This ensures that each element of the design, such as the header, footer, and content sections, can be accurately translated into the WordPress theme.
Slicing up is the process of converting design elements from a PSD file into code for website development.
- Open the PSD file in an image editing software like Adobe Photoshop.
- Identify the different sections and design elements that need to be sliced up. These may include the header, footer, sidebar, content sections, and any custom design elements.
- Use the selection tools in the image editing software to manually extract each design element. This can be done by drawing a selection around the desired element and then copying it into a new layer.
- Save each extracted design element as a separate image file. It is recommended to save them in a web-friendly format like JPEG or PNG.
- Create a separate folder in your development environment to store these image files and maintain an organised file structure.
- Once all the design elements are sliced and saved as separate image files, you can proceed to incorporate them into your WordPress theme.
By following these steps, you can effectively slice up the design file and extract the necessary design elements for your PSD to WordPress conversion. This ensures that your WordPress theme accurately reflects the visual aspects of the original PSD design.
Step 3: Set Up the Development Environment
Create a WordPress development environment using a basic WordPress host, we recommend SiteGround WordPress hosting for beginners because of their ease of use and simple website management tools allowing you to get a development environment set up quickly. Install WordPress in the development environment and set up a blank theme for customisation. We have previously written about how to install plugins and themes. We recommend using a simple blazingly fast base theme that can be easily customised such as Kadence WP or GeneratePress.

Step 4: Create the Theme Structure
Next we create the theme structure by creating a child theme and then organising the necessary code files and directories. This includes the template hierarchy, functions.php for custom functions, and style.css file for overall styling of the theme.
CSS files play a crucial role in styling and designing your WordPress theme. By creating and linking appropriate CSS files, you can customise the appearance of your website according to your design elements. Here’s how you can create relevant CSS files:
1. Naming and Saving the CSS File:
- Name the CSS file according to a suitable convention, like “style.css” or “custom.css”.
- Save the CSS file in the root directory of your WordPress theme folder.
2. Writing Basic Styling Code:
- Open the CSS file in a text editor or code editor.
- Begin by adding basic code, like setting the default font, font size, and background colour for your theme.
3. Use Proper References:
To apply the styling to specific design elements, utilize ‘id’ and ‘class’ references. For example, if you want to style the header, assign it an ‘id’ like “header” and use “#header” in your CSS code.
4. Incorporating Sliced Images:
- To include the sliced images you created earlier, you’ll need to add appropriate CSS rules.
- Use the ‘background-image’ property to specify the path to the image file you want to use.
- Ensure that you provide the correct file path for each image to display them properly.
By creating and organising relevant CSS rules, you can effectively style your WordPress theme and bring your design elements to life. Don’t forget to regularly test and preview your theme to ensure it looks and functions as intended.
Step 5: Convert PSD to WordPress
Bring the visual design into code by converting the PSD files to HTML. This involves using a visual page builder such as Elementor to convert the design elements into drag-and-drop elements. Where needed we should write HTML and CSS code and ensure that the design is accurately replicated in the browser.
Integrate the HTML code into the WordPress theme by breaking down the static content into template parts and converting the required sections into dynamic WordPress code.
Doing this conversion can be a very long process, taking several days or weeks and is often best done by a professional developer with years of experience cutting up PSD into WordPress. An experienced developer knows how best to convert the design in a way that is extensible and future-proof so the design can be expanded out and used on future pages.
Reusability is key because design elements should be shared and used on multiple pages as needed. It helps if we think of the PSD as a collection of small design elements, rather than a single unified design because inevitably in the future the PSD design will need to be expanded to new and different pages. This step includes setting up custom posts and custom post types if needed.
Step 6: Add Functionality and Customisation
Enhance the WordPress theme by adding functionality using plugins or custom PHP code. This can include adding navigation menus, widgets, contact forms, and any other dynamic elements required for a fully-functional website.
To take your WordPress theme to the next level, you can enhance its functionality by incorporating PHP, JavaScript and WordPress plugins. These programming languages allow you to add dynamic features and interactive elements to your theme. Here’s how you can do it:
1. Utilise the functions.php file:
- Open the functions.php file in your theme’s directory.
- This file acts as the central hub for including custom functionality in your theme.
- Create custom navigation elements, base views, and admin options with PHP functions (a good web developer can assist with this).
- These functions can be called from other template files or used to hook into WordPress actions and filters.
2. Include custom navigation elements:
- Create a function in the functions.php file that generates the desired navigation menu.
- Use WordPress functions like wp_nav_menu() and wp_list_pages() to fetch and display the relevant navigation elements.
- Customise the appearance and behavior of the navigation menu using CSS and JavaScript.
- Alternatively you can use WordPress plugins to achieve your desired result
3. Add base views and admin options:
- Develop functions in functions.php that create base views for various sections of your theme, such as the header, footer, and sidebar.
- Utilise WordPress template tags to dynamically display content and data in these base views.
- Enhance the theme’s functionality by providing user-friendly admin options that allow users to configure certain aspects of the theme through the WordPress dashboard.
4. Purpose of the header file:
- The header.php file is an essential component of your theme’s HTML structure.
- It typically includes the navigation elements, logo, and title/description for the website.
- Use the PHP include function to include the header file in template files where it is required.
- Customise the header file to match your design requirements and to ensure consistent branding across your WordPress site.
By incorporating PHP and JavaScript into your WordPress theme, you can add advanced functionality and interactivity, improving the user experience and making your theme more versatile.
Step 7: Test and Optimise
Test the converted website rigorously by checking for cross-browser compatibility, responsiveness, and functionality across different devices. Optimise the website by minifying CSS and JavaScript files, optimising image sizes, and implementing caching plugins to improve performance.
By following this step-by-step guide, you can successfully convert your PSD design into a highly-functional WordPress theme, delivering an exceptional user experience and a visually stunning website.
Working with Backgrounds when Converting from PSD to WordPress
Working with backgrounds is an important aspect of converting a PSD design to a WordPress theme. Backgrounds help set the overall look and feel of a website, and it’s crucial to implement them correctly during the conversion process. In this section, we’ll walk you through the steps of working with backgrounds when converting from PSD to WordPress, ensuring that your theme looks visually appealing and professional. From customising background images and gradient backgrounds to using solid colour backgrounds:

1. Working with Solid Colour Backgrounds:
When converting a PSD design to a WordPress theme, one of the important elements to consider is the background colour. Solid colour backgrounds can help enhance the overall design, create visual appeal, and improve user experience.
Identify Sections that need Solid Colour Backgrounds:
Begin by identifying the sections of your website design that you want to have a solid colour background. This can include the header, footer, navigation bar, or specific content sections.
Choose Appropriate Colour Values:
Next, determine the appropriate colour values that align with your overall design aesthetic and brand identity. These can be hex codes, RGB values, or even named colours.
Apply CSS Code:
To apply solid colours to the desired sections in your WordPress theme, you will use CSS code. In your theme’s CSS file, locate the appropriate selectors for each section and define the background colour property using the chosen colour values.
Test and Adjust:
It’s crucial to test your website to ensure that the solid colour backgrounds are displaying correctly across different browsers and devices. Make any necessary adjustments to the colour values or CSS code to achieve the desired appearance.
By following these simple steps, you can easily implement solid colour backgrounds in your WordPress theme. Remember to choose colours that align with your design and create a seamless user experience.
2. Creating Gradient Backgrounds:
When converting a PSD design to a WordPress theme, it is important to consider the use of gradient backgrounds to add visual interest and enhance the overall design. Follow these step-by-step instructions to effectively work with gradient backgrounds:
Design File:
In your design file (PSD), create a new layer or group specifically for the gradient background. Use the appropriate tools, such as the Gradient Tool or Layer Styles, to create the desired gradient effect. Adjust the colours, direction, and opacity as needed.
Saving:
Save the design file in the appropriate format, such as PNG or JPG, ensuring that the gradient background is preserved.
CSS Implementation:
In the WordPress theme, locate the section or element where you want to implement the gradient background. Use CSS code to apply the gradient effect. Here’s an example:
.section {
  background: linear-gradient(to right, #ffffff, #000000);
}
Customise the CSS code with your desired colours and direction. You can also explore other gradient options, such as radial gradients or diagonal gradients.
Testing and Adjustment:
Test the website across different browsers and devices to ensure the gradient backgrounds are displayed correctly. Make any necessary adjustments to the CSS code or gradient settings to achieve the desired appearance.
By following these step-by-step instructions, you can effectively work with gradient backgrounds when converting from a PSD design to a WordPress theme.
1. Using Background Images:
One important aspect of converting a PSD design to a WordPress theme is working with background images. These images can enhance the visual appeal of your website and create a cohesive design. Follow these steps to effectively incorporate background images into your WordPress theme:
Slicing and Saving:
When you have a background image in your PSD file, you need to slice and save it as a separate file. Use Adobe Photoshop or any other image editing tool to extract the background image from your design. Save it in a suitable format, such as PNG or JPG, ensuring optimal image quality.
Optimising Image Quality:
To maintain a balance between image quality and website performance, optimise your background images. Resize and compress the images using tools like TinyPNG or Photoshop’s “Save for Web” feature. This will ensure faster loading times and an optimal user experience.
Incorporating into WordPress Theme:
To incorporate background images into your WordPress theme, upload the sliced and optimised images to the appropriate directory. You can use the media library or directly insert the image URL in your theme’s CSS file. Use CSS code to apply the background image to the desired section or element.
By following these steps and optimising your background images, you can create a visually appealing WordPress theme while ensuring optimal website performance.
Further Customisation Options After Conversion From PSD to WordPress
After successfully converting your PSD design into a fully-functional WordPress theme, you may want to further customise it to meet your specific needs and preferences. WordPress provides a wide range of customisation options to help you make your website unique and tailored to your brand. Here are some additional customisation options you can explore:
1. Managing your Custom CSS:
WordPress allows you to add custom CSS code to modify the appearance of your theme. This gives you the flexibility to make changes to the design elements, such as font styles, colour schemes, and spacing. Simply navigate to the “Appearance” tab in the WordPress dashboard and select “Customise” to access the custom CSS editor.
Best Practices
When converting a PSD design into a WordPress theme, it’s essential to manage your custom CSS code effectively. Follow these best practices to ensure efficient code organisation and maintenance:
- Create a separate CSS file: Start by creating a new CSS file specifically for your custom code. This keeps your modifications separated from the theme’s default CSS, making it easier to maintain and update in the future.
- Follow WordPress coding standards: Adhere to the WordPress coding standards to ensure consistency and compatibility. Properly annotate your CSS code, use appropriate class and ID names, and follow indentation and formatting guidelines. This makes your code easier to read, understand, and troubleshoot.
- Use CSS validators: Validate your custom CSS code using online CSS validators. This helps identify any syntax errors or compatibility issues that may affect your website’s appearance or functionality. Fix these issues promptly to ensure a smooth user experience.
- Organise code by sections: To make your CSS code more manageable, organise it into sections based on different elements of your website, such as header, footer, navigation, and content. Use comments to clearly label each section and its purpose. This structure makes it easier to find and modify specific portions of your code.
- Make use of child themes: If you plan to make significant changes to the theme’s default CSS, consider using a child theme. This allows you to preserve the parent theme’s updates while still customising the design. Place your custom CSS code in the child theme’s CSS file to maintain a clean and organised codebase.
Managing custom CSS code is crucial for maintaining a well-structured and efficient WordPress theme. By following these best practices, you can ensure smooth customisation and future updates while adhering to WordPress coding standards.

2. Managing Custom JavaScript Code
If you are using custom JavaScript you need to manage it correctly so it doesn’t cause errors or slow down your website, here are some tips on how to effectively manage your JavaScript code:
- Create a new folder and subfolders: Start by creating a new folder within your theme directory specifically for your JavaScript files. Within this folder, create subfolders to organise your JavaScript files based on their functionality or purpose.
- Initialise the code in the correct part of the HTML file: To ensure your custom JavaScript code works seamlessly, you need to initialise the code in the HTML. Add a script tag or import in the head section of your HTML file (for scripts that need to run first) or footer (for scripts that can load after the content has finished loading) and link to the JavaScript file(s) you want to include. This initialises the necessary JS code.
- Apply custom JavaScript code to the website: Once the framework is initialised, you can now apply your custom JavaScript code to enhance the functionality of your website. This might include creating interactive elements, form validation, or implementing custom animations. Add script tags in the appropriate sections of your HTML file or link external JavaScript files as needed.
By following these steps, you can effectively manage your custom JavaScript code during the PSD to WordPress conversion process, ensuring a smooth user experience and maintaining a well-organised codebase.
3. Custom Themes and Templates:
If you want to go beyond the default themes available in WordPress, you can create your own custom themes or modify existing ones. This gives you the freedom to design a website that truly reflects your brand identity. Additionally, you can create custom templates for specific pages or post types, allowing you to have different layouts for different content.
4. Custom Posts and Post Types:
WordPress offers the ability to create custom posts and post types, allowing you to organise your content in a way that best suits your website. Whether you need a portfolio section, a testimonials page, or any other custom content, you can easily create these sections and display them in your preferred format.
5. Responsive Web Design:
With the majority of web traffic coming from mobile devices, it is crucial to ensure that your website is responsive and optimised for different screen sizes. WordPress provides responsive themes and plugins that automatically adjust the layout and design of your website based on the device being used. Make use of these features to improve the user experience and reach a wider audience.
6. Development Services:
If you have specific customisation requirements that go beyond your expertise, you can seek professional help from WordPress development service providers. They can assist you in implementing complex functionalities, integrating third-party plugins, and ensuring your website performs flawlessly.
By exploring these customisation options, you can take your WordPress theme to the next level, creating a unique and personalised website that stands out from the competition.
Using WP Runner’s PSD to WordPress Conversion Services
WP Runner is a leading provider of PSD to WordPress conversion services, helping businesses and individuals transform their Photoshop designs into fully-functional WordPress themes. With their expertise and efficient code implementation, WP Runner ensures a seamless transition from design files to a highly-functional WordPress theme.
Step 1: Submit your PSD files to WP Runner
The first step in using WP Runner’s services is to submit your PSD files. This includes all design elements, background images, gradient backgrounds, and any other visual components that you want to be included in your WordPress theme. WP Runner accepts PSD files created in Adobe Photoshop, ensuring that your design is accurately converted. Get in touch to start the process.
Step 2: Conversion process
After receiving your PSD files, WP Runner’s team of experts will begin the conversion process. They analyse the design files and convert them into CSS code, PHP files and other necessary theme files that make up a WordPress theme. WP Runner ensures that the file structure is carefully organised, allowing for easy customisation and maintenance in the future.
Step 3: Integration of custom design elements
Once the conversion process is complete, WP Runner integrates your custom design elements seamlessly into the WordPress theme. This includes applying the correct CSS code to achieve the desired visual effects, implementing custom templates for different page types, and ensuring that all design elements are properly referenced and displayed on your website.
Step 4: Adding functionality to the theme
A major advantage of using WP Runner’s services is the ability to add functionality to your WordPress theme. They can implement custom post types, create custom templates for specific content types, and develop specialised features based on your requirements. This ensures that your website not only looks great but also offers a dynamic and user-friendly experience.
Step 5: Quality assurance and testing
Before delivering your fully-functional WordPress theme, WP Runner conducts rigorous quality assurance and testing. They thoroughly review the code, test for compatibility across different browsers and devices, and ensure that all functionalities are working as expected. This step guarantees that you receive a high-quality and responsive WordPress theme.
Step 6: Delivery and support
Finally, WP Runner delivers your completed WordPress theme along with any necessary documentation. They provide you with the essential files, such as the theme folder and a complete list of files used in the conversion process. Additionally, WP Runner offers ongoing support and assistance if you require any further customisation or updates in the future.
WP Runner’s PSD to WordPress conversion services offer a comprehensive and efficient solution for transforming your static design files into a fully-functional and highly-customisable WordPress theme. By following their step-by-step process, you can seamlessly integrate your custom design elements, add functionality, and ensure the optimal performance of your WordPress website.